Color Coded Vacation Calendar
2014/02/27 Leave a comment
Requirement :
- SharePoint Calendar to track vacation for team.
- The new event form should only display Start date ,end date, category , resource name only. i.e , we need to enable “All day default” field as default in the new event form and hide it. Hide “reccurence” field and Hide Title and location column as well from newevent form.
- Each resource will have separate colors on the calendar view
- Resource Name should be displayed on the calendar view
- The Calendar should displayPublic Holidays as well (US, UK etc) in colors.

Steps:
Hide Title and Location fileds:
- Click on “event” under content types on List settings and click title, under column settings choose “Hidden”. Repeat same steps for “location” field .
- You will notice that “All day Event” and “Recurrence” are greyed out and you cannot edit the properties (you cant hide them )
Hide AllDayEvent and Recurrence fileds
- Copy the below script in a text file and save it as hideallevents.txt (jquery) in any folder (site assets)on your site
<script src=”http://ajax.googleapis.com/ajax/libs/jquery/1.2.6/jquery.min.js” type=”text/javascript”></script>
<script type=”text/javascript”>
$(function() {
$(‘td.ms-dttimeinput’).hide(); //hides the times on Start Time
$(‘span[title=All Day Event] > input’).attr(“checked”,”checked”); // checks All Day Event
//hide all of the check-boxes I don�t need
$(‘tr:has(span[title=Recurrence])’).not(‘tr:has(tr)’).hide();
$(‘tr:has(span[title=All Day Event])’).not(‘tr:has(tr)’).hide();
$(‘tr:has(span[title=Workspace])’).not(‘tr:has(tr)’).hide();
});
</script>
- On the calendar list open, open newform.aspx in edit mode i.e append ?PageView=Shared&ToolPaneView=2 on your newform.aspx page example:- http://amrita/Lists/Vacation%20Calendar/newform.aspx?PageView=Shared&ToolPaneView=2
- Now add a Content Editor WebPart. In the CEWP settings, set the content link to the url of the hideallevents.txt file, click the test link to ensure that the url is correct (i.e. it downloads the file)
- Click apply and ok and save the Page.
- You will notice that “all day events” and “reoccurence” will disappear
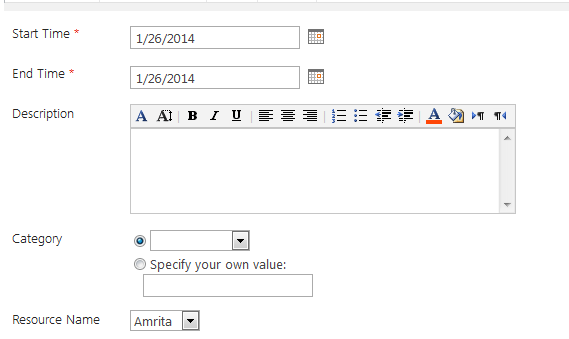
Create Column for resource name
I created choice column for resource name and added names for the employess in the choiuce column. You may create text or lookup as well
So,have 2 columns in the list already:Resource Name = column (choice) for Resource names and Category = category (choice) for vacation type (default)
Color coding Calendar based on resource names
- Copy the below script in a text file as vacationcalendar.txt (jquery) script to any folder on the site (for example site assets”)
<script type=”text/javascript” src=”http://ajax.aspnetcdn.com/ajax/jQuery/jquery-1.5.1.js”></script>
<script type=”text/javascript”>LoadSodByKey(“SP.UI.ApplicationPages.Calendar.js”, function () {
WaitForCalendarToLoad();
});var SEPARATOR = “|||”;
function WaitForCalendarToLoad() {SP.UI.ApplicationPages.SummaryCalendarView.prototype.renderGrids = function SP_UI_ApplicationPages_SummaryCalendarView$renderGrids($p0) {
var $v_0 = new Sys.StringBuilder();
var $v_1 = $p0.length;for (var $v_2 = 0; $v_2 < $v_1; $v_2++) {
this.$7V_2($v_2, $p0[$v_2]);
}
for (var $v_3 = 0; $v_3 < $v_1; $v_3++) {
$v_0.append(‘<div>’);
this.$I_2.$7Q_1($v_0, $p0[$v_3], $v_3);
$v_0.append(this.emptY_DIV);
$v_0.append(‘</div>’);
}
this.setInnerHtml($v_0.toString());
ColourCalendar();
}SP.UI.ApplicationPages.CalendarStateHandler.prototype.onItemsSucceed = function($p0, $p1) {
if (this.$K_1.$8G_0()) {
this.$28_1();
return;
}
this.$41_1 = false;
if (this.$3G_1) {
this.$D_1.$4T_1();
this.$3G_1 = false;
}
if (SP.UI.ApplicationPages.SU.$2(this.$39_1[this.$j_1])) {
this.$39_1[this.$j_1] = [];
}
Array.addRange(this.$39_1[this.$j_1], $p0);
this.$D_1.$7S_1(this.$j_1, this.$v_1, $p1, this.$39_1[this.$j_1]);
this.$j_1++;
this.$1h_1();
ColourCalendar();
}
}function ColourCalendar() {
if(jQuery(‘a:contains(‘ + SEPARATOR + ‘)’) != null)
{
jQuery(‘a:contains(‘ + SEPARATOR + ‘)’).each(function (i) {
$box = jQuery(this).parents(‘div[title]’);
var colour = GetColourCodeFromCategory(GetCategory(this.innerHTML));
this.innerHTML = GetActualText(this.innerHTML);
jQuery($box).attr(“title”, GetActualText(jQuery($box).attr(“title”)));
$box.css(‘background-color’, colour);
});
}
}function GetActualText(originalText) {
var parts = originalText.split(SEPARATOR);
return parts[0] + parts[2];
}function GetCategory(originalText) {
var parts = originalText.split(SEPARATOR);
return parts[1];
}function GetColourCodeFromCategory(category) {
var colour = null;
switch (category.trim()) {
case ‘Amrita’:
colour = ‘#90EE90’;
break;
case ‘Amrita2’:
colour = ‘#FF6600’;
break;
case ‘Amrita3’:
colour = ‘#FFB6C1’;
break;
}
return colour;
}</script>
- You can modify the ‘function GetColourCodeFromCategory’ and change/append resource names and colorcode accordingly. You do not need to modify anything else in the above script. Make sure that Resource Name in column (choice) is exactly same in script else the color coding wont work.
- Pick colors (codes) from http://www.w3schools.com/tags/ref_colorpicker.asp?colorhex=D3D3D3
- Create a calculated column “Name” with the formula =UPPER([Resource Name])
- Add a another calculated field called CategoryTitle with the formula:
="|||"&[Resource Name]&"|||"&Name&"|||"&Category - Now edit the calendar view and in view settings-> calendar columns change the Month View, Week View and Day View under the “Calendar” view settings to be the new CategoryTitle field instead of default Title
- If you create additional view , you need to repeat the above step for each view else the color will not display for resource names
- On the calendar page (calendar.aspx), edit the page and add a Content Editor WebPart. In the CEWP settings, set the content link to the url of the newly uploaded text file, click the test link to ensure that the url is correct (i.e. it downloads the file). You can “hide” the CEWP webpart if you want from webpart properties..
- Click apply, Ok and save the page .
Adding Public Holidays (using Calendar Overlay) feature
- We need to first publish Public holiday (US /UK or corporate calendar) on a separate calendar list. if you alreday have your corporate calendar , you can publish it directly.
- I used a tool SharePoint Holiday Loader (codeplex) to load the holiday calendar. You can easily find hol file in your MS Outlook folder or download outlook.hol file which is a MS holiday calendar file.
- You can load all the holidays or country wise. I wanted just UK and US holidays , that too in seperate colors so i created 2 calendars/event list – US public holidays and UK Public holidays separately
- Now Go back to your Vacation calendar , in the calendar tab click “calendar overlay”
- Click “Add new calendar”, Add title ,choose appropriate color and in web url type the URL of the site where US and UK calendars were created
- Click resolve and choose the list, choose always show and click OK
- Repeat the same steps to add UK calendar
- The Public Holiday calendar can be used by any site collection/subsite using the Calendar overlays within the same web application.
References:
i used the jquery scripts from below blogs,
http://www.planetwilson.co.uk/sharepoint-2013-colour-calendar/
http://www.planetwilson.co.uk/sharepoint-2013-colour-calendar/
